The Shade That Is Part IV: Protocols For Proper Shade Selection
We have now understood the definition of color, the factors that affects our color perception, the materials and equipment you may opt to use in getting the right tooth shade for your shade selection and understand the reasons why all the details that will be suggested below are necessary to do in order that we can do properly our job as professionals to our patients and renders the result as an Esthetic Dentist should be.
Here are the Proper Guidelines In Shade Selection:
1. Patient should be viewed at eye level and at arms length, so the most sensitive part of the retina will be used. A selection distance made at 3-6 feet from your eyes to the oral cavity of your patient as this is the common condition under which the patient’s teeth will most often be observed.
2. Avoid Eye Fatigue. Shade selection should be done within 5-10 seconds. Generally, the first shade selected is the correct one. The color vision capability of the eyes decreases when a tooth is viewed for longer than 10 seconds. The observed color becomes less and less saturated while simultaneously increasing the chroma of complementary colors. However, it should be noted that the most ideal time that we should do it is within 5 seconds because after 5 seconds of staring at a tooth or a shade guide our eyes will have a different color perception and adapts to the shade to whatever it perceives to be. This phenomenon is called Hue Sensitivity.

3. It is recommend you gaze at a neutral grey wall card. In fact, looking away at a grey card between each 5-7 second shade evaluation will reset the focus of your eyes and depth perception. This is similar to smelling coffee beans when we are trying to smell different perfumes. It neutralizes our eyes perception.

4. Shade comparisons should be made under different lighting conditions. Initial shade may be taken under a color corrected fluorescent light and then confirmed in natural daylight such as taking patient to an operatory window. It is also best if we placed a light gray cover at the back of the tooth where the shade selection is being made to neutralize the darkness on the oral cavity that may affect the value choice of your shade.
5. Request the patient sit up or stand up when determining the shade. The tab should be parallel with the tooth being shade matched so to minimize depth perception errors.

6. Make your final shade selection after comparing your shade selections with those of another team member or even your patient. This works to double check your choice.
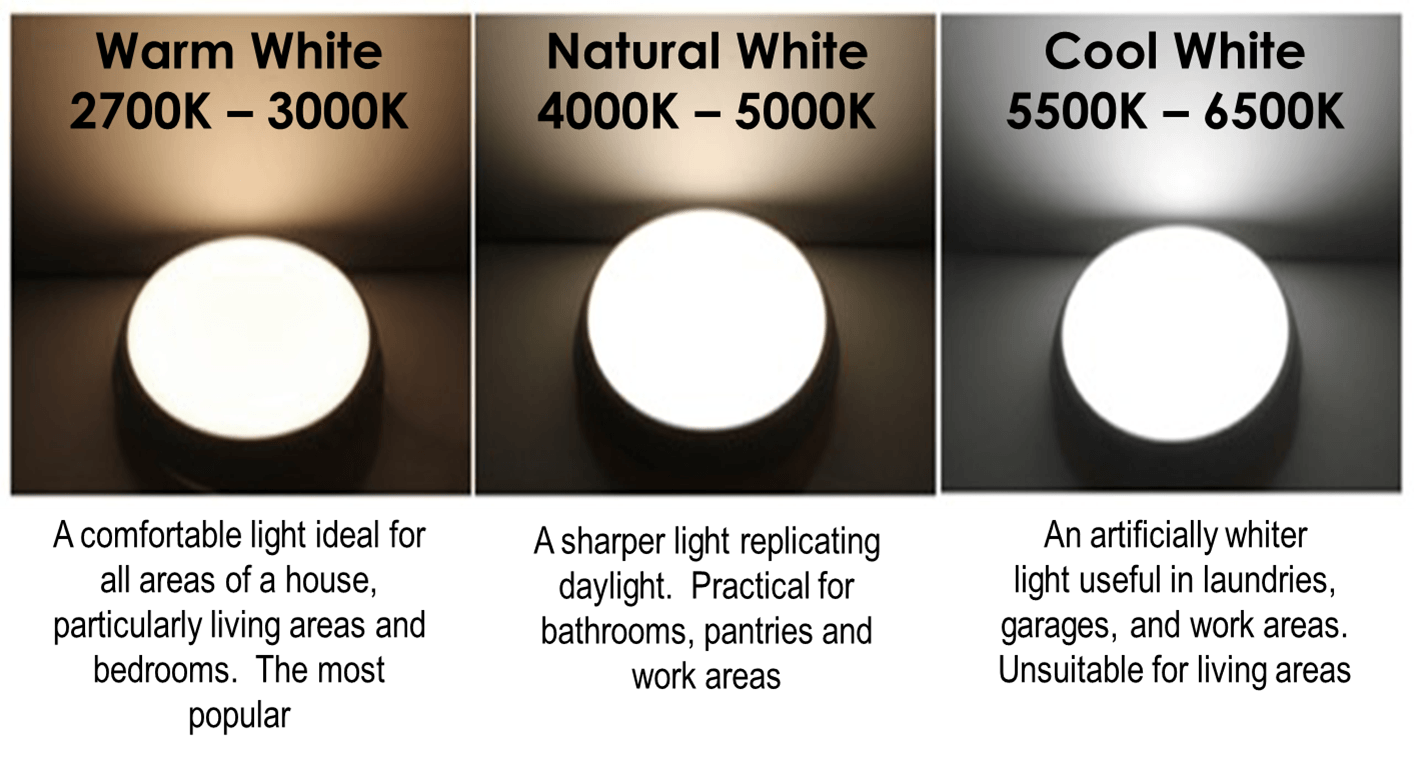
7. It is ideal to do shade selection at noon hour on a bright day. This is considered to be the ideal definition of Northern Daylight because the incident daylight is most balanced within the Visible Light Spectrum. To imitate this on Artificial Light, the light should have at least the recommended standard for dental shade matching's color temperature of 5500°K and a color-rendering index (CRI) greater than 93. In LED Light, it is between the Natural White to Color White. It has to range between 5500°K to 6500°K color Temperature.
8. Make the shade selection at the beginning of the appointment and prior to tooth preparation. The teeth dry out during treatment, especially towards the end of a dental procedure and under rubber dam isolation and while making addition silicone impressions. It then takes almost 20–30 minutes for the tooth color to return to its baseline values. When the tooth is dry their value (whiteness) increases while their chroma and translucency decrease. Shade selection is also contraindicated after using a curing light as the tooth is even more dehydrated on this condition.
9. Make sure that teeth is moist and not too wet or desiccated. Teeth to be matched should be cleaned of all debris and stains. Prophylaxis should be done before shade selection
10. Paint the Operatory Walls in Pale Blue or Pale Gray-Blue which complimentary to the most comma color of human’s teeth which is yellow.

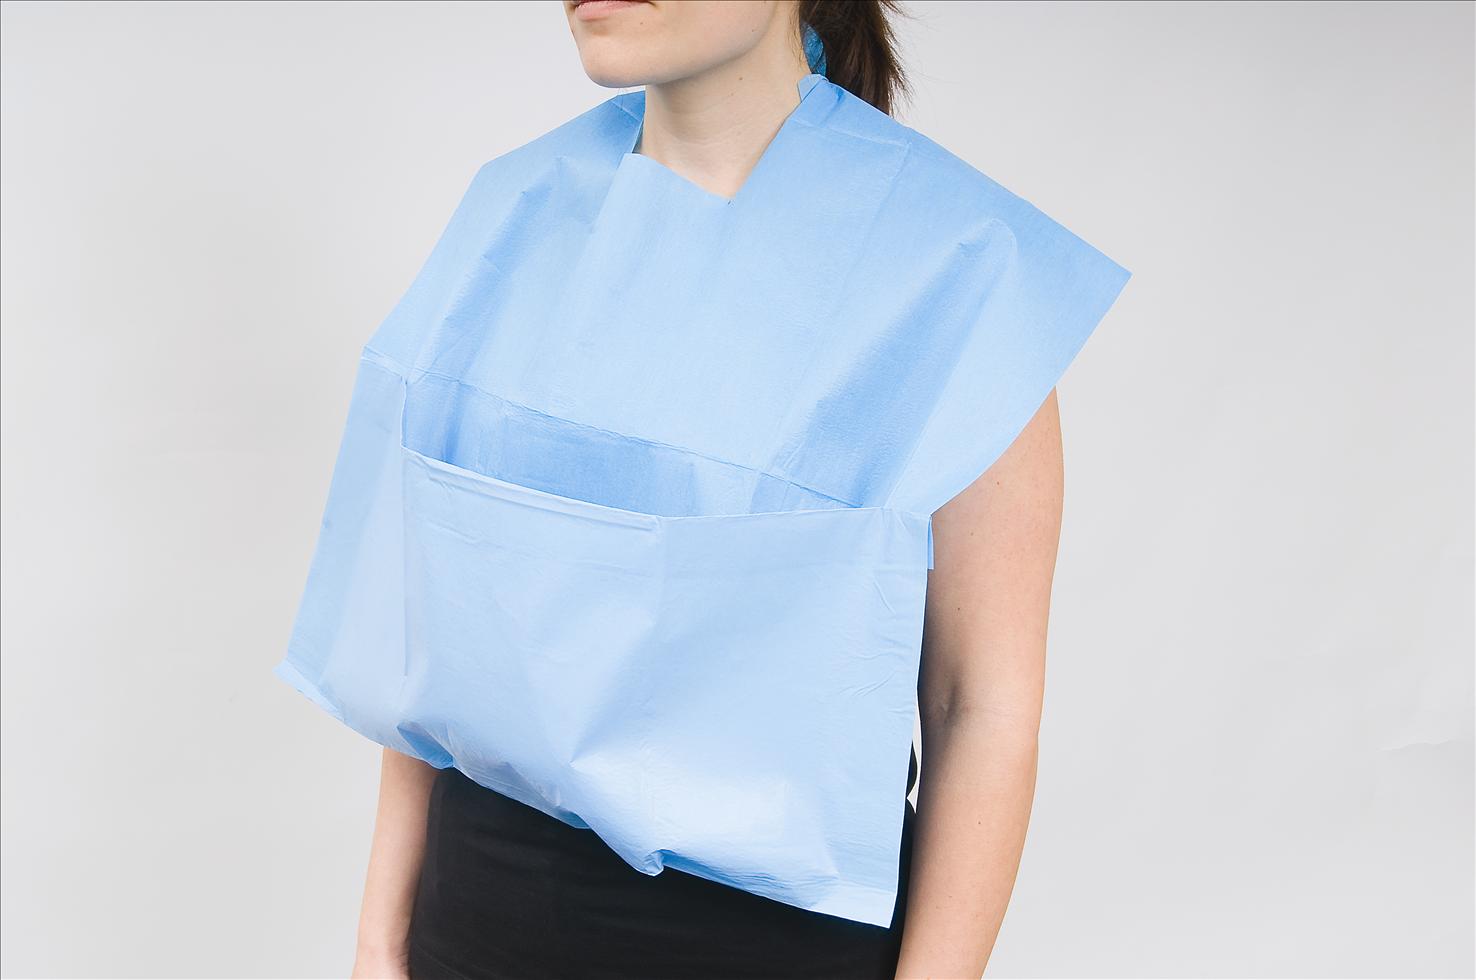
11. Drape the patient with Bib that is light blue or blue or gray color. This re-sensitize your eyes to yellow color of teeth by focusing on a pale gray-blue surface immediately before and during the shade selection procedure.
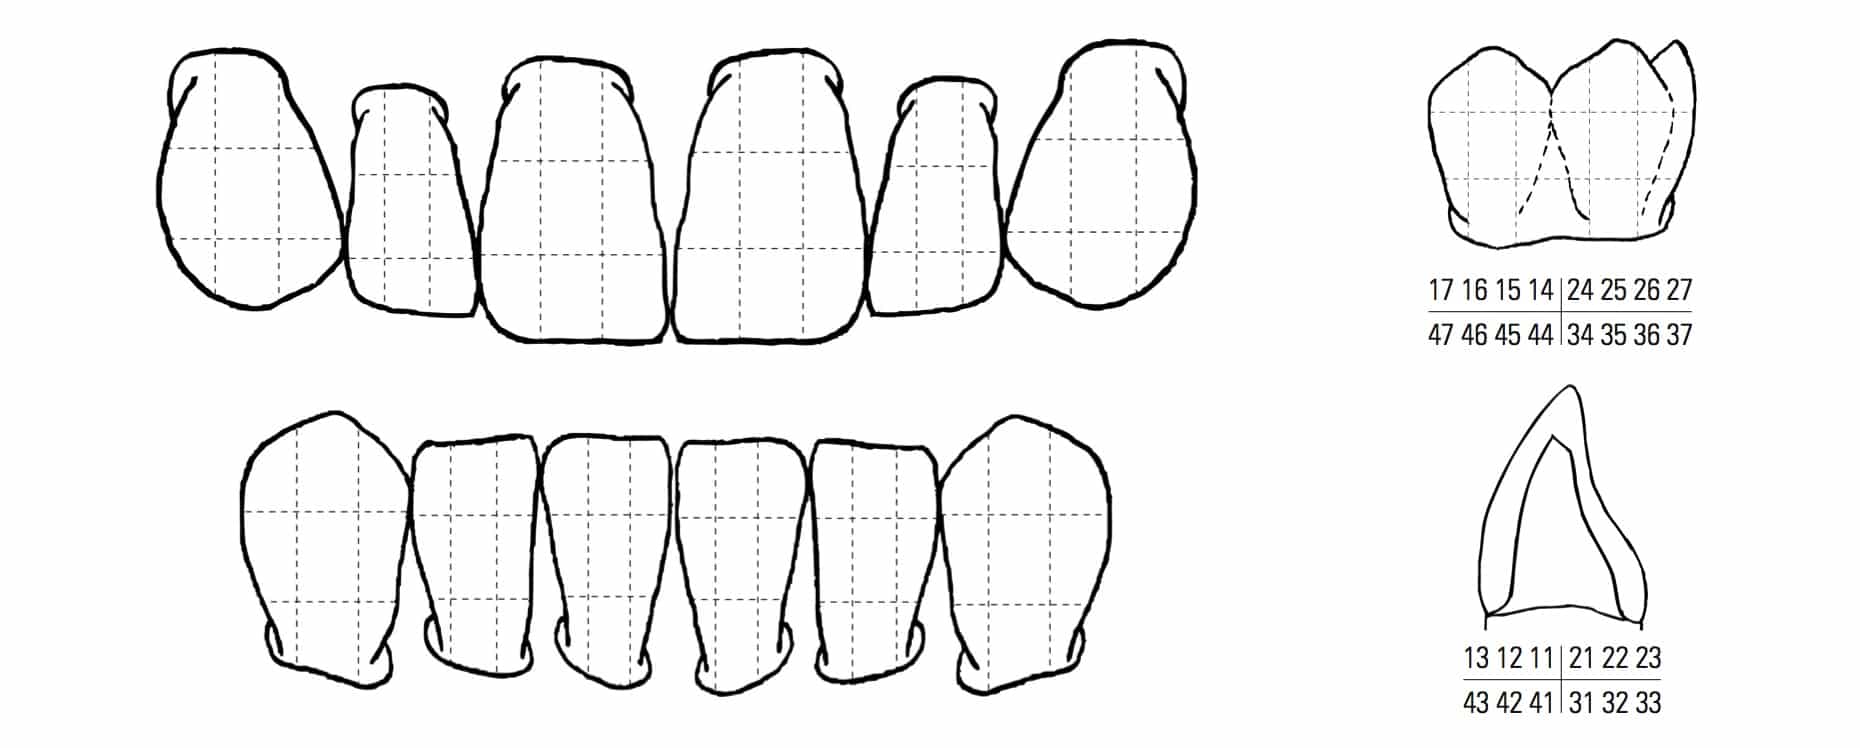
12. Tooth Shade Mapping is considered a practical approach when doing shade selection. A practical approach is to divide the crown into two, three or four equal portions, and then shade should be selected separately for each portion. Readings can be plotted on a shade distribution chart, which also allows to copy certain surface characteristics into the fabricated restorations. The Canines are a good reference point in selecting a shade because they have the highest chroma (intensity) of the dominate hue (color) of the teeth.

13. The patient should remove any lipstick or bright makeup. Why? Lip color can be altered through the use of lipstick. Presence of dark colored lipstick creates the illusion of whiter teeth.
14. It is believed that individuals with darker skin color have lighter shades of teeth, which is explained by the illusion of greater contrast between skin color and tooth shade. Thus, choosing a lower value in color for dark skinned will look whiter and higher value of color will look like a bleached color.
15. Drape all bright colored clothing prior to shade selection.
16. All dental personnel should have their color vision tested every 2-3 years during their professional careers.
17. Compare your shade selection under varying conditions such as with lip retraction versus lip down.

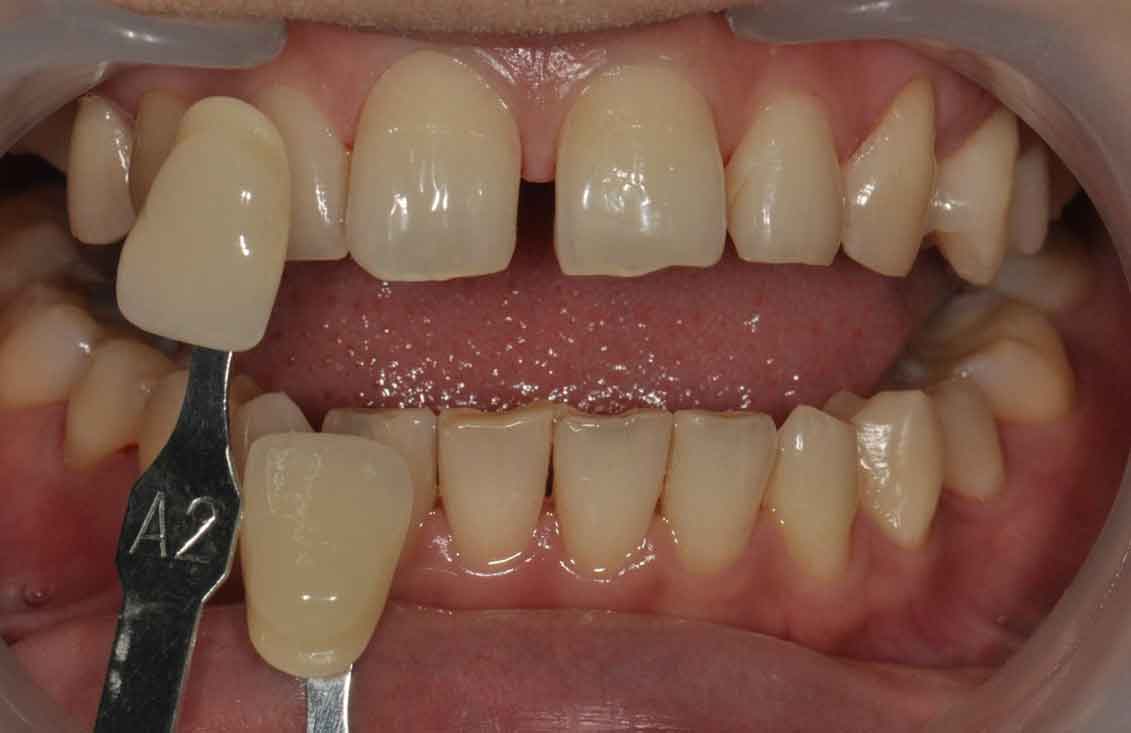
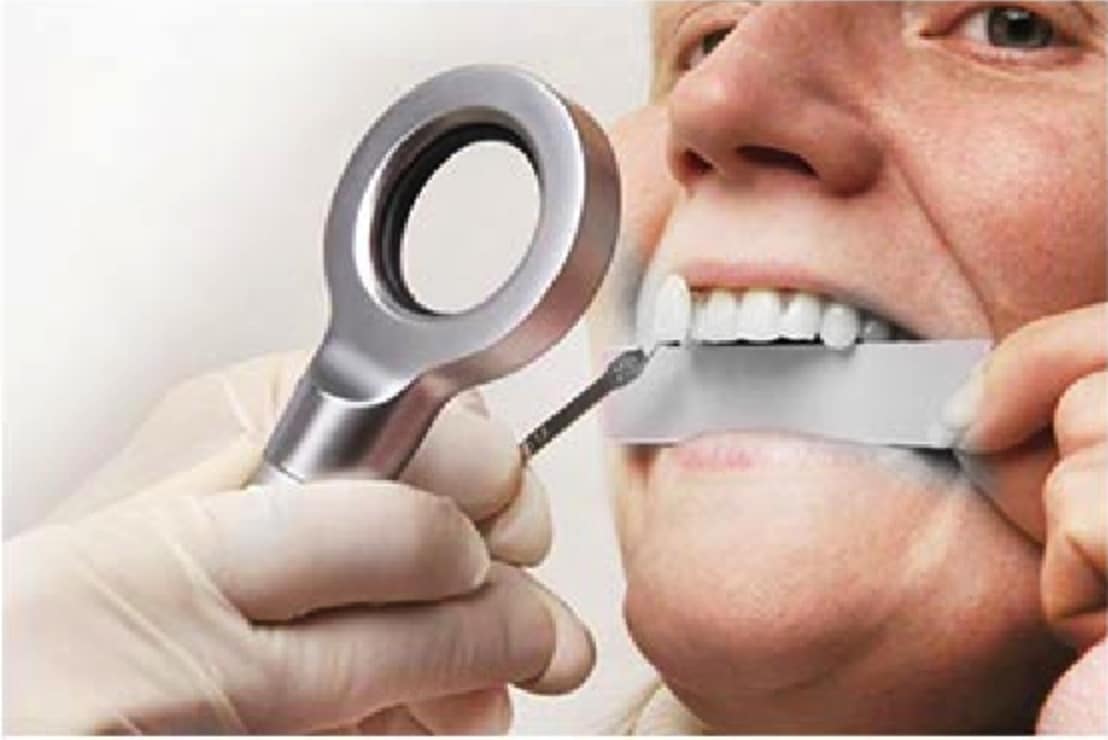
18. Take a Digital Photograph with the shade tab and exposed shade number included in the photo provides many of the anatomical characteristics that can help your laboratory to understand better your instruction.

19. Take note that shade tabs degrade due to aging and disinfection. So, make sure to replace them when it happens. Understand the how your shade guide works, if it is arranged according to value, chroma or hue.

20. When taking a shade guide and you are doing tooth mapping, make sure that the color you are comparing it to is also on the same location on the tab you are using. Meaning if you're getting the cervical shade of the tooth then you should look at the cervical portion of the tab itself and not the entire shade tab.