HOW CAN WE MAINTAIN AND MAXIMIZE THE FUNCTIONS OF OUR HANDPIECES AND OPTIMIZED ITS BENEFITS IN OUR DENTAL PRACTICE?
The introduction of both high and low speed dental handpieces have revolutionized our dental treatments, allowing significant improvements, most especially, in the practice of Restorative Dentistry that provides in the end efficient patient care. However, just like cars, without proper preventive maintenance, failures are bound to happen. Handpieces are the dentist's main “money-maker's” tool as they generate value, comfort, and deliver service for your dental practice. So, the best way to provide its deserved maintenance from you is to implement a schedule routine that focus both on daily and required specific scheduled care. To assists you in making sure that you can prolong the life span and optimize the benefits your handpieces can bring you, here are some tips that you can certainly do:
KEEP IT CLEAN
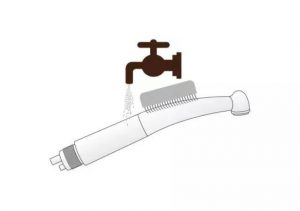
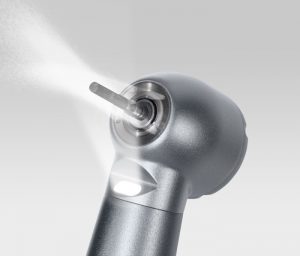
➢Before removing the handpiece from the supply hose water, it should be flushed through the functioning dental handpiece for at least 30 seconds. This aids in removing contaminants. There are brands of handpieces that will instruct you to retain the bur while doing this and other brands that will need for the bur to be removed during this step. Thus, make sure that you have read the recommendation of the manufacturer.
➢Immediately thereafter, the unit should be surface cleaned to remove biological debris from the external surface of the handpiece. It is advisable to use a brush with soft bristles and warm water to avoid any damage to the handpieces when cleaning its outer surface. Avoid cold water as it may cause blood to coagulate inside the instrument and block the bearings and clump.
➢Avoid use chemicals or abrasives, because they will damage the outer surface layer or coating of the handpiece and cause them to deteriorate in appearance, and moreover, even remove the inner layer of lubrication.
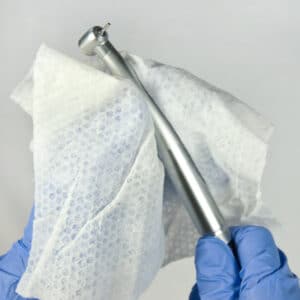
➢The next step in maintaining dental handpieces is to ensure thorough drying after surface cleaning the instrument.
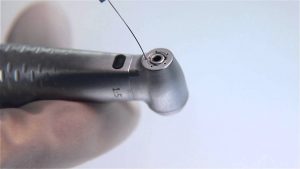
➢In Fiber Optics, the next step to properly maintaining dental handpieces is to ensure that you take the time to clean the fiber optics. This process only requires a Q-tip and a small amount of alcohol. This will remove oil and debris from the surface of the fiber optics. As a result, discoloration will not occur and buildup will not develop on the surface.
REMINDER: DO NOT immerse the instruments in disinfectant liquids, because they corrode mechanical parts.
LUBRICATE PROPERLY
➢It is imperative that you use a lubricant specific for handpiece use for the lubrication of your handpieces.
➢Lubricate it at least every after 30-45 minutes of continuous use and at the end of every procedure before autoclave process.
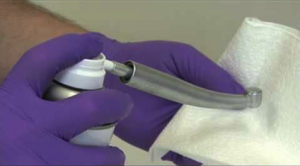
➢Oil should be sprayed directly into the air line until it is emitted from the head of the handpiece as this ensures that all of the internal bearings have been properly lubricated. Always keep the oil spray can in an upright position when doing this. Remember, use pressurized air to push the oil through the dental handpiece, otherwise, the bearings will not be impacted.
➢Spray lubrication through the handpiece for 2-3 seconds into a clean tissue.
➢Attach the handpiece to the delivery unit tubing and run the handpiece for 20-30 seconds, after you have lubricated.
REMINDERS:
➢DO NOT oils used for other mechanical equipment or hinges.
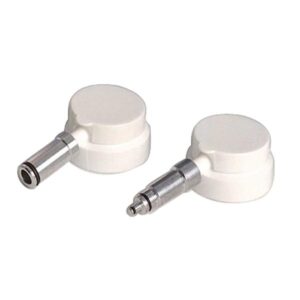
➢Select the correct oil adaptor for the handpiece you want to lubricate. Ensure nozzle is securely attached.
➢In cases after oil spray, the excess oil is discolored, you have to repeat the process 2x-3x until the oil is clear. This ensures deep clean has been achieved. If it does not come through clear after 3 sprays, send off for a service. This discoloration is due to a rusting issue.
NO TO DIY REPAIRS
These are some guide questions to help you recognize if there is a problem in your handpiece.
1. When you spin the bur in the handpiece between your fingers, do you feel grittiness?
2. Does the handpiece sound different?
3. Does the handpiece not cut as well as it is before even when you're using a new bur?
4. Can you remove your bur easily?
5. Does the bur attached to your handpiece wiggle when used?
In case you answer yes to any of these questions, your handpiece have already malfunctioned. We suggest not to try to fix it yourself. Leave the repairs of your dental handpiece to the professionals. Even if it seem like they're an obvious solution to a small problem, this could cause damage than good to the handpiece, or even void your warranty.
REMINDERS:
➢In case your bur can't be removed, please DO NOT force it out. Doing this may damage the chuck and it will cost you more than just waiting for a professional to remove the bur from your handpiece for you.
➢As per mentioned above, if after lubricating the handpiece more than 3x and the color of the excess oil remains brown or discolored, please have your handpiece check by a professional. If the oil comes through the head of the handpiece has a black discoloration, continue with the remainder of the sterilization process and send the handpiece for a service before it can be used again.
FOLLOW MANUFACTURER'S INSTRUCTIONS
In air-driven hand pieces, high air pressure does not equate to high performance. Using the wrong air pressure for extended periods could seriously damage the device’s turbine and ball bearings which can drastically shorten its overall lifespan.
Do not control the speed of your handpieces through your foot control by stepping on it intermittently while drilling. This often times shorten the lifespan of the rotor of your high speed handpieces.
Pay attention to the manufacturer’s specifications and follow them to the letter as this could avoid serious damage to the turbine, regardless of whether you are working with a high or low-speed device.
Make sure you have thoroughly cleaned out the retraction pastes and gels you used in your treatments. These are usually made from a viscous paste of diatomaceous clay that contains astringent component (often aluminum chloride 15 %) which is responsible for the hemostatic effect, and a component for the tissue displacement (often kaolin, that absorbs sulcus fluid and expands), thus, usually these pastes may cause damage to your handpieces' external and internal parts.
CHECK THE CHUCK
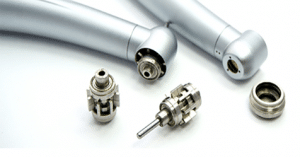
The chuck is located at the handpiece’s head and is responsible for holding the bur in place. It is an important part and should be given separate care.
➢Your chuck should be cleaned daily and lubricated at least once a week.
➢When sterilizing, remove the bur and release chuck levers beforehand. Compression of any springs and levers during heating process may cause them to weaken, shortening the life of your handpiece
➢Use a small interproximal brush (or similar brush) dipped in alcohol. Insert the brush into the bur tube and rotate the brush several times. Repeat this process until the brush comes out clean.
➢The manufacturer’s instruction manual provides important information regarding daily and weekly maintenance and correct RPM’s. Dental low handpieces should run anywhere between 30,000 – 40,000 RPM’s and air-driven dental handpieces generally run anywhere between 200,000 – 420,000 RPM’s, so if you start to exceed 40,000 RPM’s and 420,000 RPM’s, respectively, you will definitely damage the turbine and the chuck. Read and check the manufacturer’s instruction manual as this provides important information regarding daily and weekly maintenance and correct RPM’s your handpieces should run.
➢Know and Identify the Vibrations and Speed:
Excessive Vibrations: Is your dental handpiece vibrating more than you consider normal? This could be an indication that the bearings within the handpiece are loose. If this is the case, they’ll need to be replaced by a dental handpiece repair specialist. Alternatively, the problem could be caused by a lack of lubrication and, if so, the handpiece should be flushed with oil as directed by the manufacturer.
Reduced Revolution Speed: Over time, you may find that your handpiece’s rotation speed decreases significantly. This is most likely caused by a fault with the turbine inside, or with several other potential issues. You will need to get this addressed if you want to continue carrying out successful treatments on your patients.
Disturbed Rhythm: If your handpiece makes clunking noises and rotates irregularly, this could be a motor or turbine problem. This is often caused by old age or a lack of regular servicing, and you will need to get your motor or turbine replaced. This will ensure consistently smooth revolutions that don’t pose such a risk to the teeth and gums of your patients.
WAYS TO IMPROVE YOUR HANDPIECE PERFORMANCE
➢Do not sterilize handpiece with bur inserted.
➢Do not use dry heat or heat-transfer sterilization method.
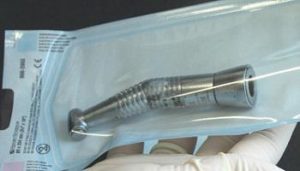
➢Place handpieces in a sterilization pouch and seal them. We recommend autoclaving for 20 minutes (minimum holding time) at 121°C or 15 minutes (minimum holding time) at 132°C. Class B or S sterilization. (All NSK handpieces are autoclavable up to 135°C)
➢After the sterilization cycle, immediately remove handpieces from the autoclave. Keep them in dust-free, sterilized storage or bring them to a treatment room for use.
CONCLUSION
Handpieces are integral tool in our daily dental practice, thus, we believe all of us would prefer that they last longer and function well especially as these are one of the tools that we do insert inside our patient's mouth. We certainly don't want untoward accidents to happen and injure our patient during the treatment. It is imperative that we invest time, effort and money to maintain these tools as this is one of our expenses well worth the investment.
CONTRIBUTORS:
Dr. Bryan Anduiza - Writer
Dr. Mary Jean Villanueva - Writer | Editor


