The Key Ingredients To Make Your RCT Simply Works
First of, I need to be clear that I am NOT an Endodontist, however, I’ve been trained by a lot of well-respected Endodontists here and abroad, hence, I was able to pick their brains on how to simplify this procedure, which I must admit found it too complicated and too much of a hassle before, and make it simply work. Second, the brands of the materials mentioned here can be replaced by your preferred brands as long as the chemistry is the same and you follow their manufacturer's instruction.
During my recent several lectures about RCT, there are so many in the audience who are asking me to create a blog that will assists them in remembering some of the parts necessary for them to apply what I recommended in my lectures, so, here it is as promised.
To make your RCT case have a higher chance of being successful here are the key ingredients and steps to know and do:
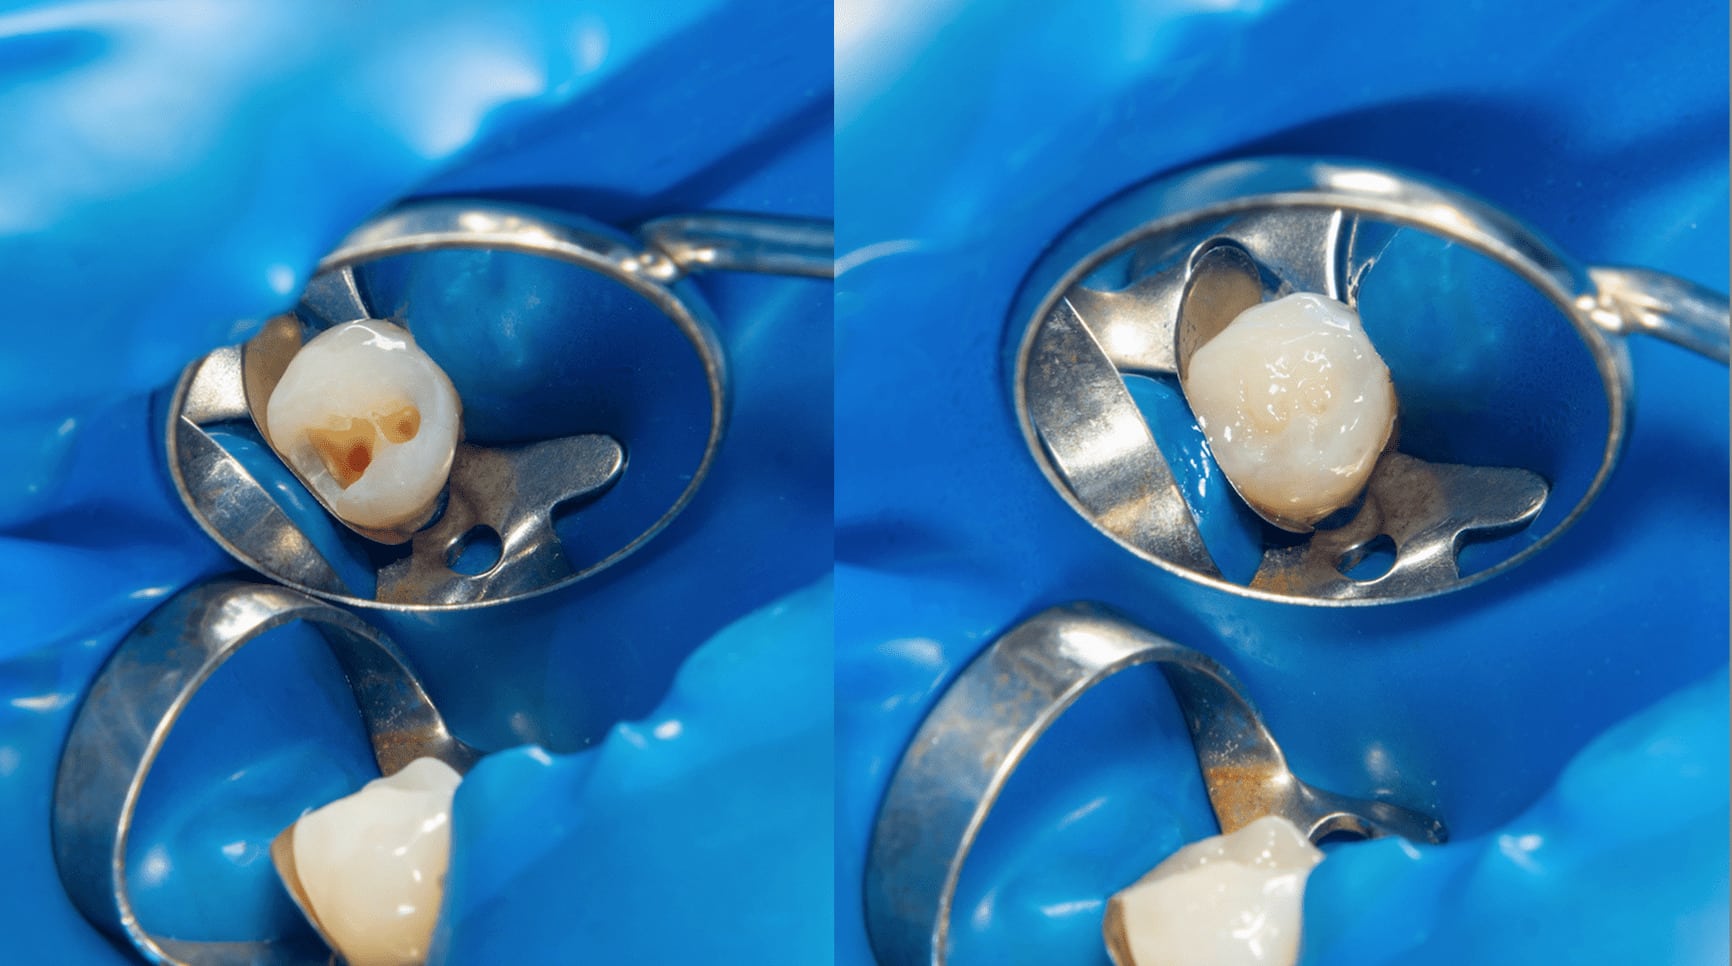
I. Isolation - You have to use rubber dam in your Endo cases. This is NOT optional but a MUST. All of the Endodontists whom I personally met, spoke and trained with will tell you that if you don’t use rubber dam, then, might as well extract the tooth.
Our Problems:
a. Difficulty of Placement
b. Hassle when we are going to take a radiograph because we will need to remove it every time we need to take an x-ray.
Our Solutions:
Here are the materials and the steps I recommend to make these problems go away:
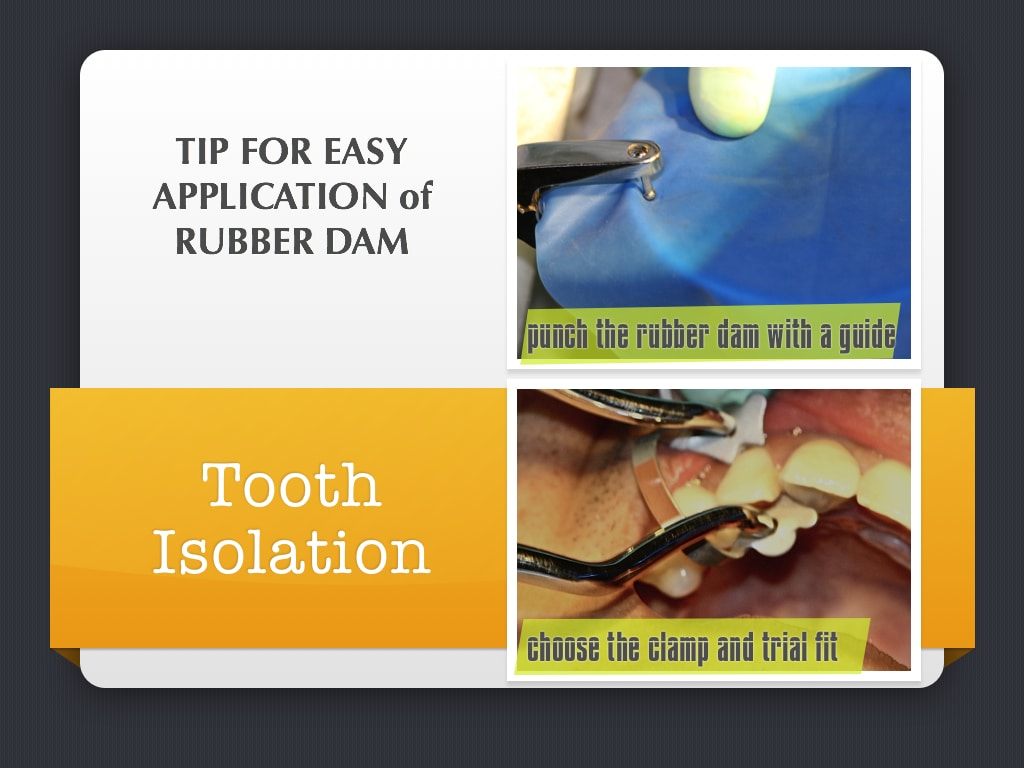
(1) I use Coltene Fiesta Rubber Clamps. It is color coded and durable. Although, its price is bit more expensive, it's well worth the investment because when placed properly it is stable during your treatment.

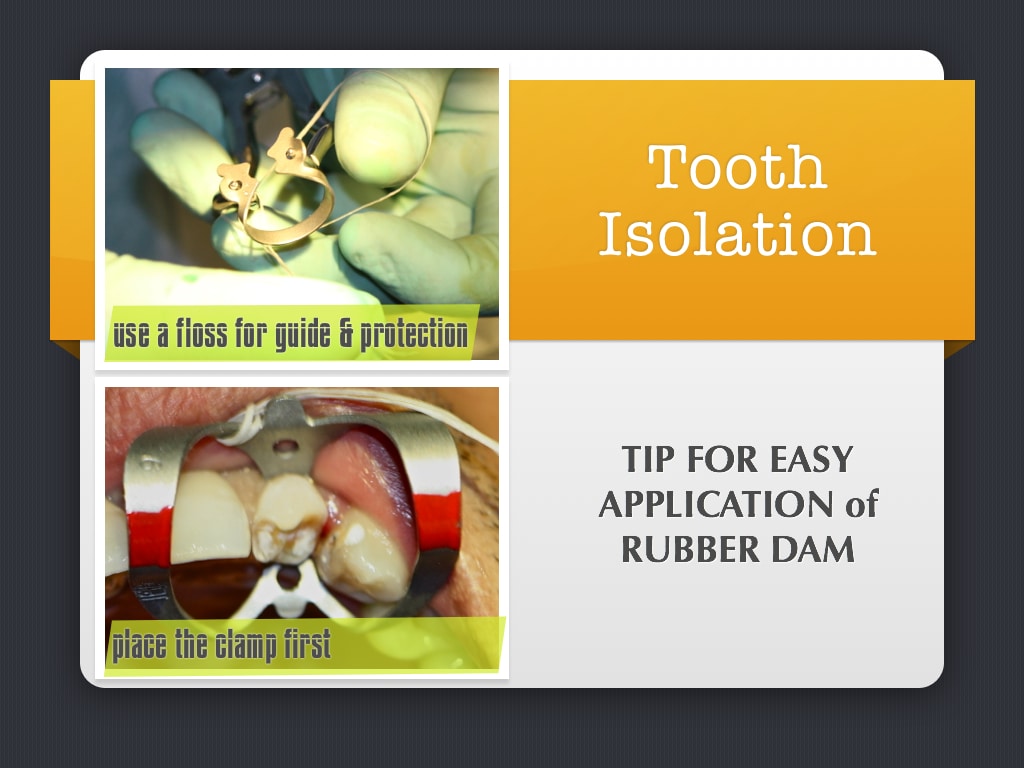
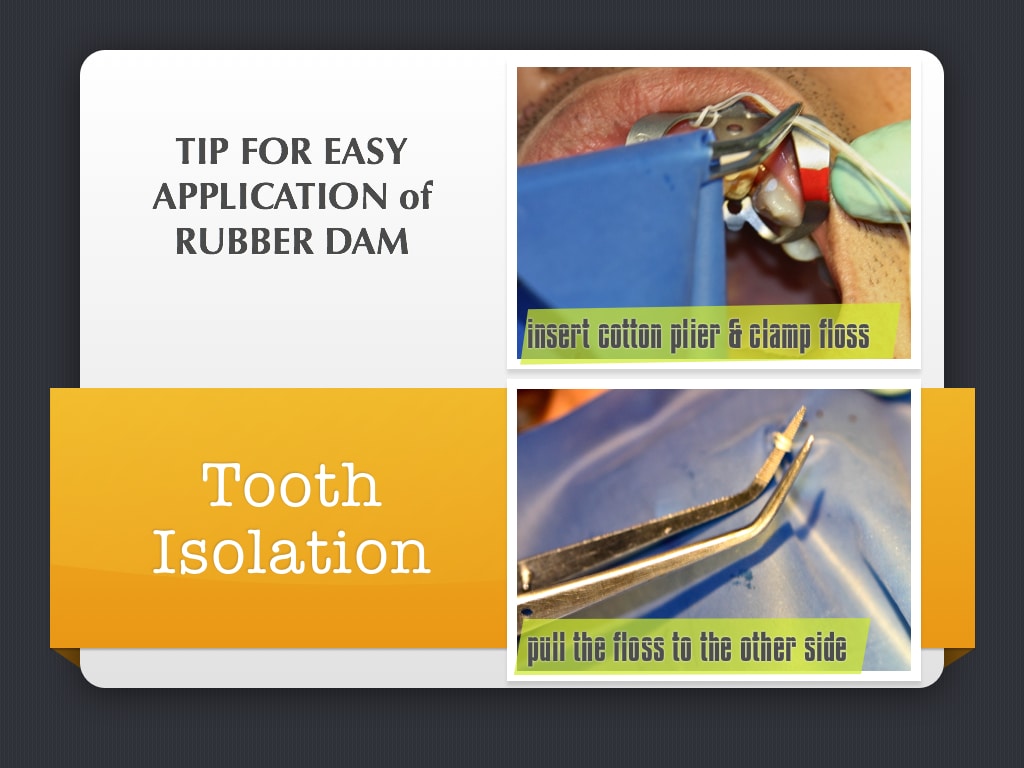
(2) This is the trick to easily place your rubber dam without pinching the gums of your patient and making sure that your clamp is placed properly:
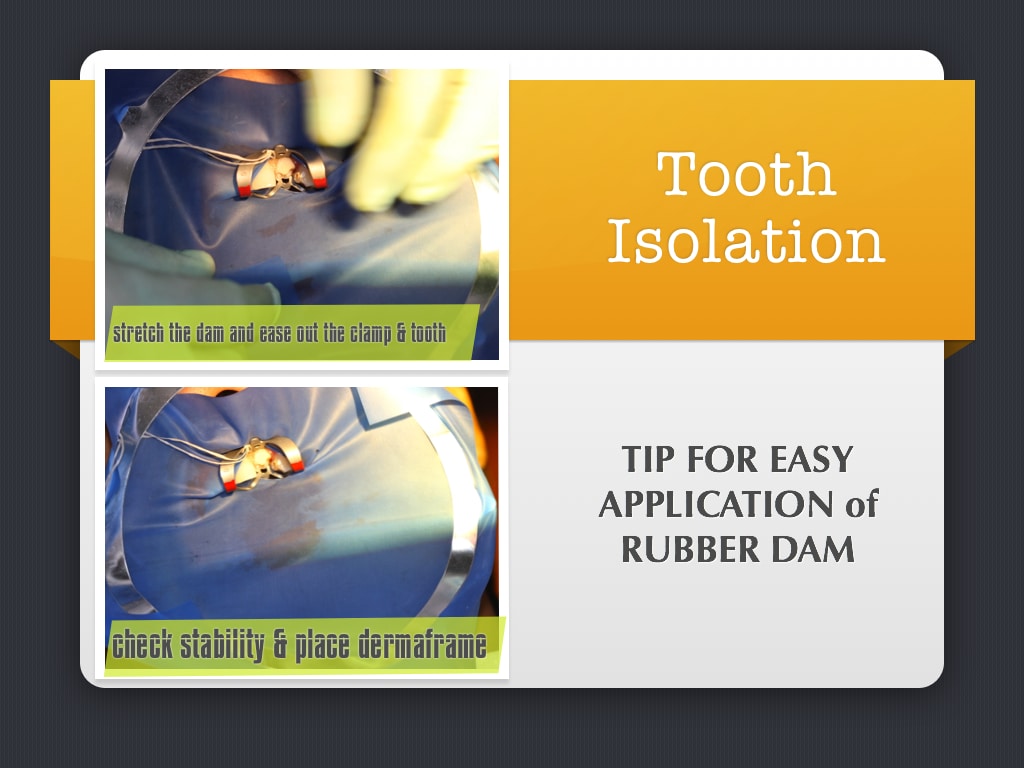
(3) I use Ultradent Derma Frame and Dam. The Derma Frame is bendable, so, if your patient is claustrophobic you can bend it down to not cover the nose of your patient and he/she can breathe easily. Another thing, you don’t have to remove your rubber dam when taking an x-ray or even placing a salivary inside the mouth of the patient because again it is flexible and can be bend for x-ray film placement plus the frame doesn’t show in your x-ray.
On the Derma Dam, it doesn’t have a smell, it is latex free and can be stretch as reasonably far as you want without tearing.

II. Radiograph - If possible take a digital x-ray because it has better resolution and can be measured and manipulated through an application. You can also save it if you have a patient record application in your computer. You can try RVG of Carestream Dental or the Rio Sensor of RayScan.
Click Carestream RVG
Click RayScan RioSensor
III. Irrigation - Sometimes we concentrate so much on the mechanical enlargement of the canal that we take for granted the solutions we use in our irrigation. This is actually one of the main reasons why we fail in our RCT most of the time. We use wrong solutions not in accordance to the purpose of why we use them. So, here are the well-evidenced based suggested solutions by majority of well-respected Endodontists you may use for your irrigation and how to do it properly:
Solutions Are Arranged According to the Sequence of Use:
(a) Sodium Hypochlorite - Now, we can all pretend we don’t use the industrial NaOCl but that’s really the reality, isn’t it? So, if you do, just make sure your NaOCl ratio with your water will result to at least at the average of 2.5% NaOCl. Please make sure that the mixture of NaOCl with water will NOT be used when its mixed is already more than 4-5 minutes as NaOCl is very unstable and its effect to do properly its job when you use industrial NaOCl mixed with water. It will deteriorate in its effectiveness after 5 minutes.
Please take note that there is NaOCl created precisely for dental use. It has other contents that maintains its stability. The ideal concentration is between 2.5%-3% NaOCl to be applied constantly at 40 minutes as this is the safest to not result to iatrogenic hypochlorite incident. Some prefer it at 5.25% because it is the concentration that is more effective in killing Enterococcus Faecalis commonly found in infected canals more than we think. However, this becomes more toxic and may cause damage if it is accidentally excreted outside the canal thus the use of Chlorhexidine later is a much better and safer alternative.

You use this during mechanical enlargement because it is effective in dissolving organic matter, pathogenic organisms and pulp digestion. There’s just simply NO replacement of it just yet.
Our Problems:
There are a lot cases wherein the solution escaping the confines of the tooth and entering the periapical space. This can result to a burning sensation and the consequences maybe edema, hematoma, ecchymosis.
Our Solutions:
(1) I recommend that you use the Ultradent Sideport as a Tip. It truly delivers the job of having nil or no chances of the solution going out of the apical foramen.

(2) I sincerely insists that you don’t re-use your disposable syringes. The keyword there is “Disposable”. If you keep re-using it there’s a tendency that the rubber on the plunger may become sticky and difficult to push, hence, when we put more force, so, it can do its job, the solution is released into the canal with high velocity of pressure, therefore, resulting to the NaOCl coming out of the apical foramen of the tooth you are working on.

(b) Lubricant - This is introduced into the canal along with NaOCl ONLY on your very FIRST File you will use to enlarge the canal. A few years back, the procedure is to do this with every file used to enlarge the canal, however, current studies show that if you use this during the entire mechanical instrumentation, the dentin soften too much and much is unnecessarily removed including sound dentin. So, you use this ONLY on your first file no matter what system you use. The brand that I personally use is File-Eze by Ultradent. There are a lot of Endodontists who use the ProLube or its Glide Lubricant by DentSply. However, I suggest you don’t use it IF your final sealer of your obturation is made of resin as the resin will not set.

(c) Distilled Water | Saline Solution | Anesthetic Solution - After you finished your mechanical enlargement of your canal, make sure you irrigate it well with any of these solutions. You can pick one but truly irrigate at least 10-20 cc of it. Much better if you use Distilled Water because it is more effective to eliminate the chemical agents or to neutralize NaOCl effects. In necrotic tooth, this will inhibit:
- Their flow towards the periodontal tissues
- The alteration of the filling material
- The formation of a precipitating layer due to the crystallization of sodium hypochlorite after drying the canal walls.
NOTE: According to several recommendations, if you have an endo ultrasonic scaler, this is the best time to use it for it provides better cleaning action rather than its effectivity to be used for enlargement. Its vibration will shake whatever remaining debris left inside the canal.

(d) EDTA (Ethylene Diaminetetraacetic Acid) - this is usually between 17% to 18% concentration. After washing the NaOCl with Distilled Water and drying, introduce the canal to EDTA.
FUNCTIONS OF EDTA:
- EDTA is a chelating agent and is an organic acid which eliminates the mineral part of pulp tissue.
- It acts as surface tension inhibitor that will allow better contact with the dentin for a higher efficiency of the product use for obturation.
- It facilitates the flow of the different irrigants in the lateral canals permitting a chemical preparation of all the endodontic system.
- EDTA plays an important role in the reduction of inflammatory reaction by inhibiting the affinity of macrophages to the vaso-active peptides of the pulpal tissue.

There are 2 schools of thought on how long the EDTA shall be placed in the canal before drying it. The first one is 30-60 seconds while the second is 4-5 minutes. However, both groups are in the same agreement on the time frame wherein EDTA should NOT exceed in the canal for more than 5 minutes.
(e) Chlorhexidine - can be used for a total elimination of the bacteria inside the canal. It is usually at 2% in concentration. It is much safer and very effective in eliminating a biofilm of E. faecalis than NaOCl and against Gram-positive and Gram-negative bacteria as well as yeasts. Leave it in the canal for 5 minutes, then, dry. Your canal is now ready for obturation if the case can already proceed on that step.
Why CAN’T we use Chlorhexidine as an irrigating solution during mechanical enlargement of the canal?
Despite its usefulness as a final irrigant, chlorhexidine cannot be advocated as the main irrigant in standard endodontic cases, because:
(a) Chlorhexidine is unable to dissolve necrotic tissue remnants.
(b) Chlorhexidine is less effective on Gram-negative than on Gram-positive bacteria.
Why we can NOT use Chlorhexidine Mouthwash?
Although, it both contains Chlorhexidine, there are other contents included in the mouthwash such as emollients and surfactants that will leave thin film on the dentinal walls we are trying to open for the sealer in our obturation. The best simile for explanation is like when we compare detergent soap and a body soap. Both are considered soaps but you will not use a detergent soap in your body, right? So, Use ONLY Chlorhexidine created specifically for Dental Treatment.

(e) Calcium Hydroxide - is an ideal medication placed inside the canal that significantly further reduced bacteria. It is very alkaline with a pH as high as 14 or even more. Being so alkaline does several good things:
One, it dissolves little bits of remaining tissue that the metal files missed.
Two, it dissolves the cell membranes of bacteria, which can cause toxicity even when the bacteria are dead, but by dissolving this cell wall, it eliminates the toxicity effect.
Three, it gradually dissolves into the moisture at the farther distance of minute tubules that makes up the dentin from the nerve canal even up to the extent nearest to the outside surface of the tooth root. We know that bacteria can and do get stuck in these small tube-like tubules and can effectively "hide" away from our cleaning efforts in the main nerve canal space, so, with Calcium Hydroxide, it dissolves into the deeper recesses of the tubules and can kill the bacteria hiding there.
It is very important to leave the Calcium Hydroxide in the canals for at least 4 weeks for maximum effectiveness. 97% of case studies show that leaving Calcium Hydroxide at a minimum of 4 weeks renders the canals bacteria free.

(f) Citric Acid - is an acidic material that is effective to be used instead of EDTA if there’s a presence of internal resorption in order to eliminate the granulation tissue and to obtain smooth dentinal walls. This will also ameliorate the adaptation of the filling material. This is also ideal to use in removing Calcium Hydroxide from the canal with the use of NaviTip FX.

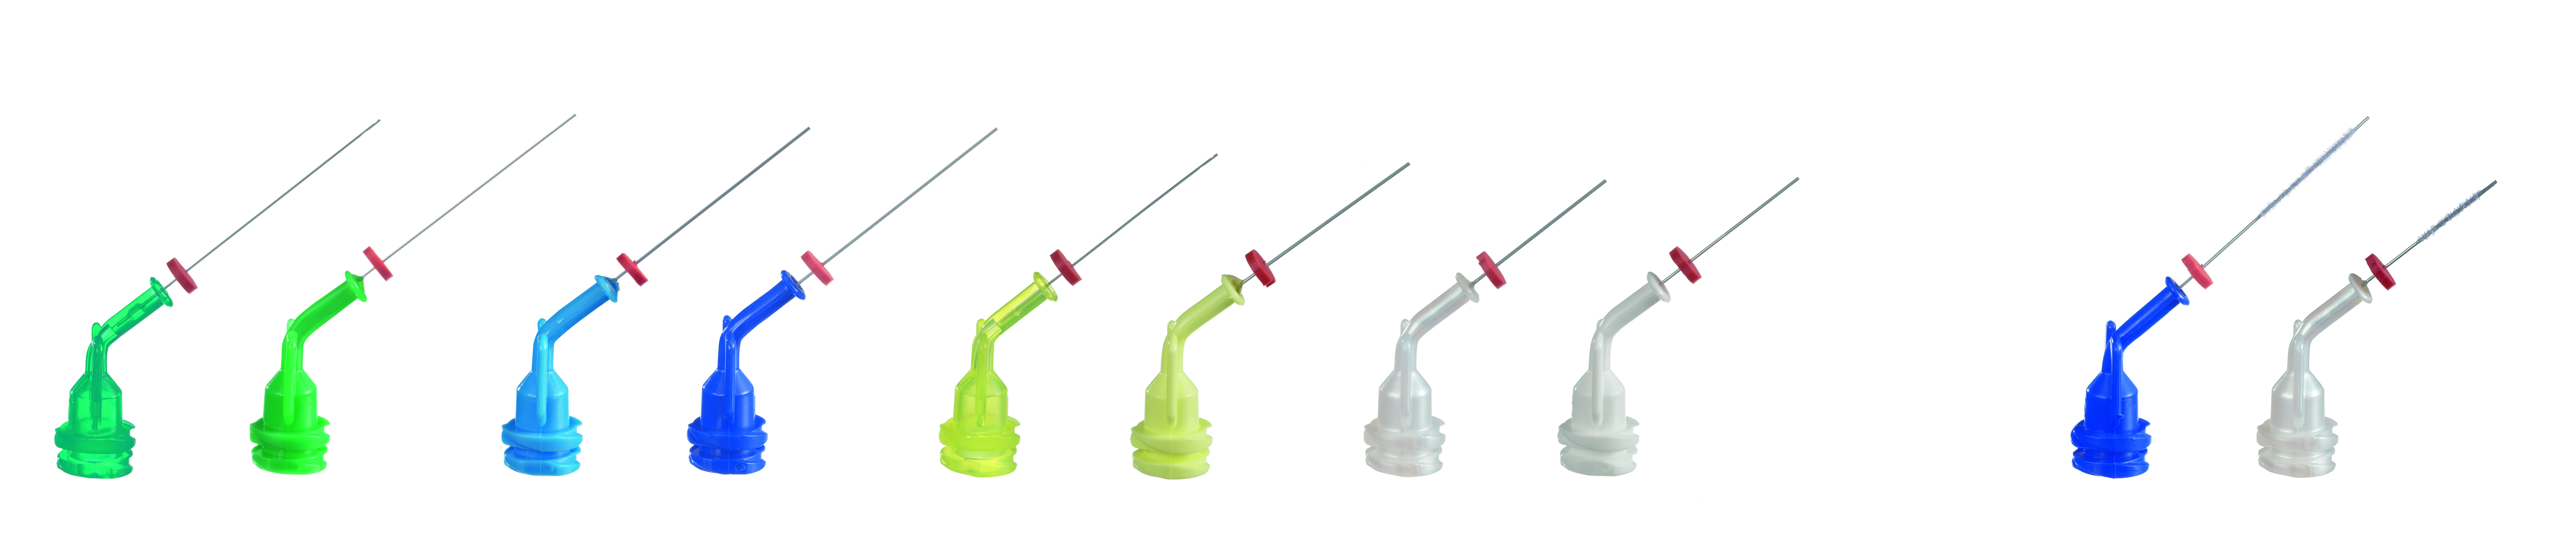
All these solutions need to be introduced to the canal properly and I recommend the use of Ultradent Navitips. These tips have been widely used and recommended by a lot Endodontists as this provide the thinnest diameter that can successfully deliver the solutions and medicaments within the root canals, even if they are not from Ultradent. Always measure the length of insertion by using this formula: Tooth Length MINUS 3.
These are available in color-coded indicators in different gauge from 29, 30 and 31 gauge and in lengths from 17, 21, 25, and 27 mm. If you use UltraCal from Ultradent you need to use 29 gauge ONLY. 31 gauge is ONLY available for NaviTip Sideport as this is best to deliver Sodium Hypochlorite within the canals. There’s also NaviTip FX that has a brush on its tip which is ideal to use with Citric Acid to remove Calcium Hydroxide material within the canals.
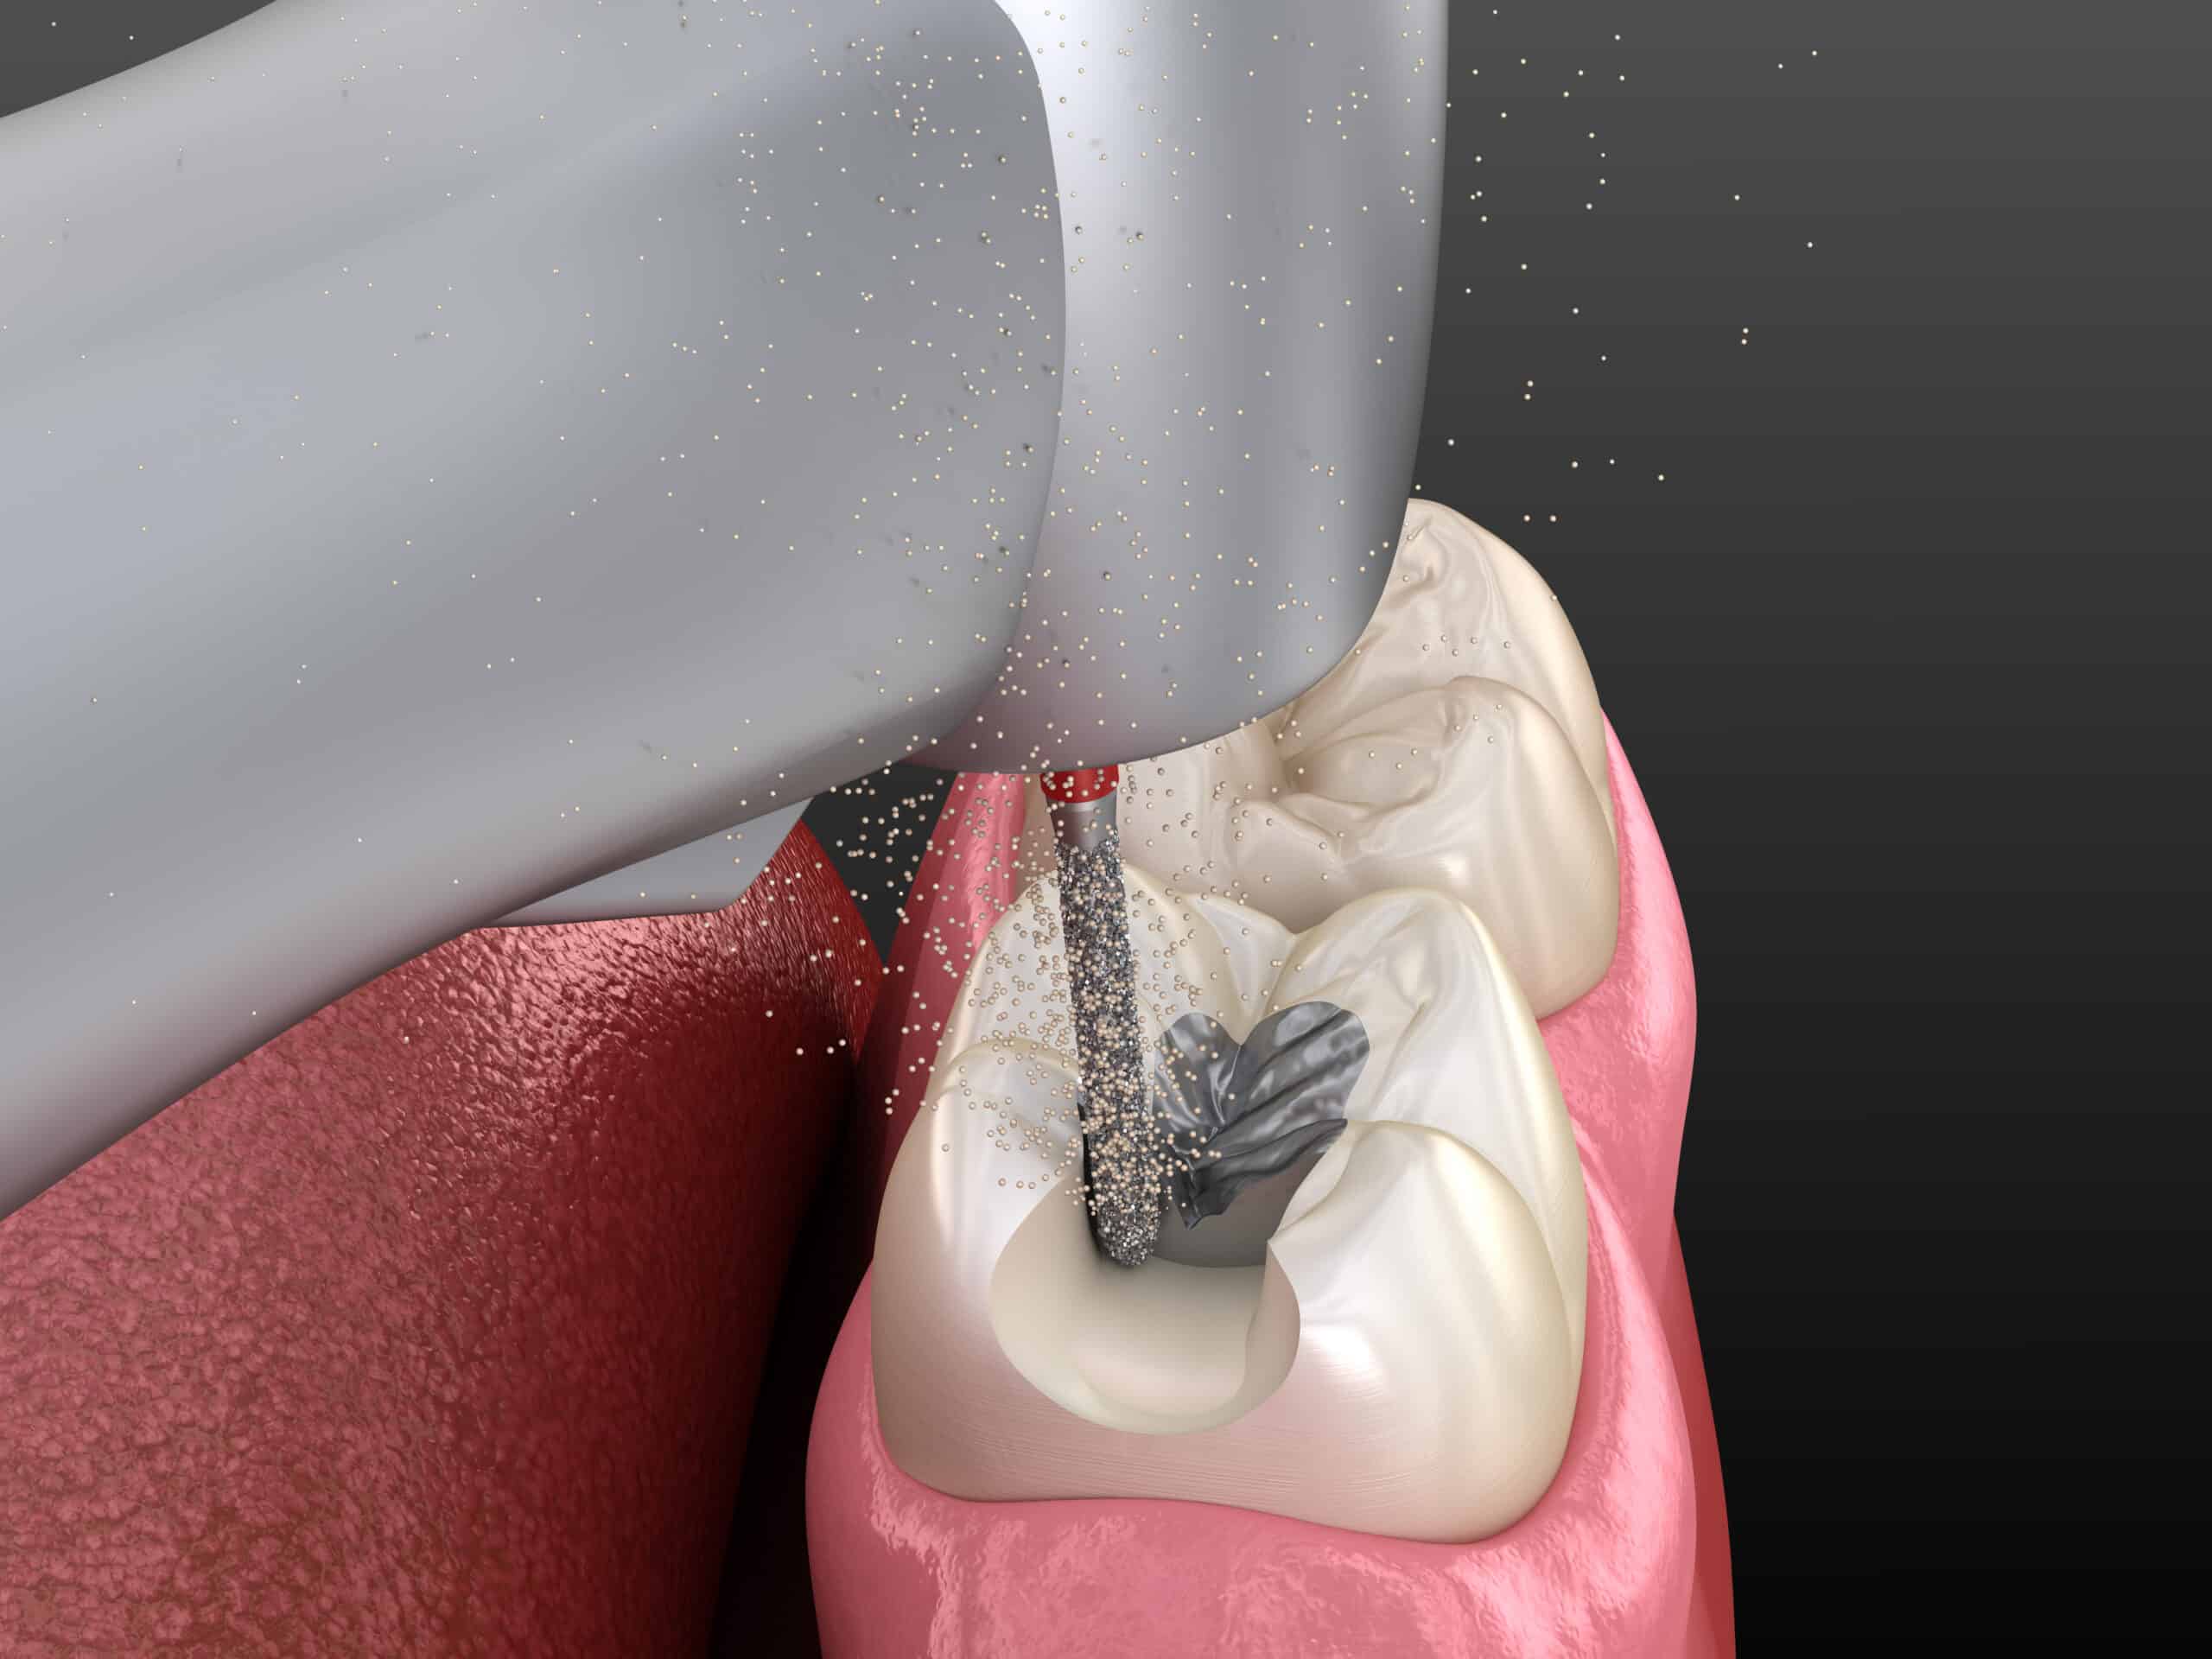
IV. Mechanical Instrumentation - How do we want to enlarge the canal is less in importance as to how we properly use these tools. Understanding the functions of Rotary Systems, Oscillating Systems, Ultrasonic Equipment, NiTi System and even the manual technique are critical. You need to use what is best for your belief in the anatomic considerations of root canals.
Whatever you use in enlarging the canal, make sure that you don’t do up and down movement as the debris may get packed on the apical 3rd. Always do upward stroke.
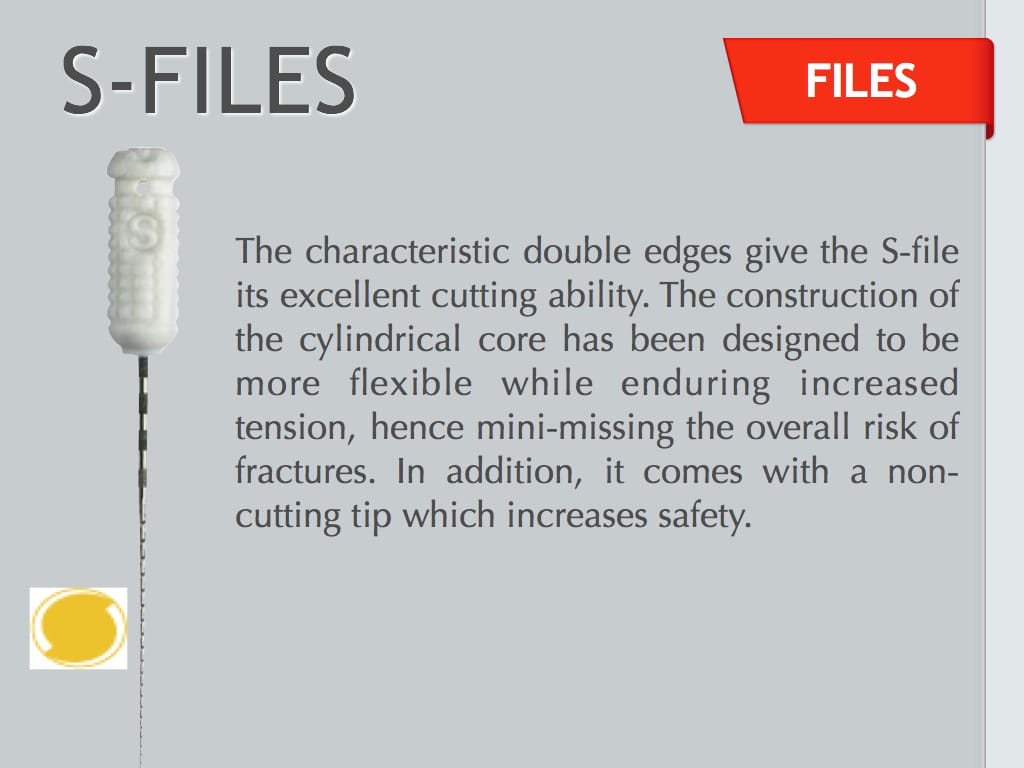
If you are using hand files, then, I do recommend that you use S-Files rather than K-Files because it is double cutting and can do the job faster. It is less time consuming and taxing to your hands.
Between the use of Niti Files and Stainless Steal File, then, I use it according to what my purpose is. If I need to remove a bulk of the dentinal walls such as the coronal 2/3, then, stainless steel is ideal because it's sturdy and more unbending when there's increase force application. If I need to access a curved canal, then, I use NiTi due to its flexural strength. I also re-use NiTi Files ONLY according to the number of times it can be used specified by the manufacturer. This will prevent retrieval of fractured files problem common to re-using files too many times.
Personally, I believe in Oscillating movement of the handpiece due to the fact that most anatomy of the root canals are more elliptical rather than cylindrical or circular, thus, I use Endo-Eze AET which provides oscillating technique in enlarging the canal. However, Ultradent is coming out with the new system that can do both functions, rotary and oscillating movements. It probably due to the fact as well, as any Endodontists will tell you, there's no one system that works for all.

For those who have been requesting the procedure for Endo-Eze AET, here are the steps for enlargement:
1. Through your initial radiographic x-ray, measure the tooth length (this is from the tip of the cusp to the tip of the apex) NOT working length. If it is multi-rooted, consider each root as if it is a single tooth. So, if you have 3 roots, you should have 3 tooth length measurements.
2. The set of files of Endo-Eze AET are color-coded. Each corresponding to a specific length.
For the old version of Endo-Eze AET files (that will be obsolete and will not be available by the end of this year or until supply lasts from its distributor, which is Dental Domain), here are the sets of files:
- White is extra-short from 16-19 mm
- Yellow is short from 20-23 mm
- Blue is medium from 24-27 mm
- Green is long from 28-31 mm

The current one, for the Tilos Files which is now a combination of NiTi and Stainless Steel files:
- White is Pedo at 19 mm
- Yellow is short at 23 mm
- Blue is medium at 27 mm
- Green is long at 31 mm

You will know what set of files to use when you know your tooth length. So, for example, for single-rooted tooth IF the Tooth Length is 21, then it means the set of files you will use is Yellow. For multi-rooted Tooth, for example, you have TL at 14 mm, 16 mm, and 26 mm, then, choose Green and just adjust the length of the files when used for the shorter canals.
To know lengths of the files when used, FOR OLDER VERSION of Endo-Eze AET: All ENGINE FILES are Tooth Length MINUS 3 and the HAND FILES are Tooth Length MINUS 1.
For the Tilos Files, the sequence is like this:
(1) White-banded Engine File is Tooth Length MINUS 3
(2) 1st Red-banded Engine File with big diameter is Tooth Length MINUS 6
(3) 2nd Red-banded Engine File with a bigger diameter is Tooth Length MINUS 3
(4) Go back to the White-banded Engine File IF after checking the latency and glide path with your master apical hand file that it is now free from coronal constriction at its working length. White-banded Engine File will now be measured at Tooth Length MINUS 1.
(5) All NiTi Hand Files will be Tooth Length MINUS 1.
3. DO NOT Insert the Engine Files while it is running. Insert it first then step on your foot control to run the handpiece.
4. You have to make sure that your hand stroke when using oscillating handpieces NOT ONLY in Endo-Eze AET, are in upward brush stroke and motion along the dentinal walls of the canal and NOT the circulating hand stroke style used in rotary handpieces.
5. DO NOT while doing the upward brush stroke to Take Out the File in its Entirety while enlarging, instead position it in the middle of the canal space when switching into another part of the dentin canal walls.
V. Obturation - You have to understand the difference between a FILLER and a SEALER. The gutta percha is considered as a FILLER while most cements especially those that are resin-based are SEALERS. The question in cases of how to remove it for re-doing the RCT makes a lot of respected Endodontists perplexed because for them this should NOT be the mind-set of those who will be practicing Endodontics. You need to do it right the first time, so, that question need not to be answered. However, for re-doing someone else’s work or after several years it has to be re-done, then, that’s where the importance of the GP takes place. Since, it is affected by temperature, GP is much easier to remove than when the canal is fully obturated by sealers only especially if it is resin-based.
The material to what to use as a sealer depends on what you prefer, however, since most often than not our final restoration is made of composite resin as well as if you will use fiber-reinforced post and core, it is much better if your sealer will be resin as well. This makes it possible for the tooth along with the materials used to act as one with a unibody support IF undue force is applied to the endodontically- treated tooth now with a higher probability rate for fracture. If all materials used are resin then it is all bonded to one.
There are different techniques to obturate the canal but, I, for one, don’t like Lateral Condensation because not only it is time consuming, it also has a higher rate of technique errors if inadvertent mistakes are done by the dentist. I also don’t like the use of heating GP because if done wrong, it can cause micro cracks to the tooth. I must say I am totally bias with Endo-Rez because it never failed me.

One, it is very easy to use.
Two, it takes me only 5-10 minutes to do my obturation.
Three, it is indeed more often than not hassle-free.
Fourth, it is biocompatible, so, even if it extrudes outside the apex as long as there is NO GP that came with it, then, it will naturally be absorbed. In fact, it even acts as a total seal to the apex.
Fifth, the probability of error is nil to none IF you follow its instruction. You can even use whatever kind of GP you prefer such as the ordinary GP, thermafil, soft core, etc. Ideal will GP coated with resin such as the Endo-Rez Points.

The only disadvantage I see with Endo-Rez is cost. That is something I can live with because it is indeed money well spent and value for my money.
For those who have been requesting for the procedure of Endo-Rez, here first are the critical reminders:
1. NEVER MIX the Endo-Rez on a mixing pad. ALWAYS use the mixing tip and its accessories for its preparation. Endo-Rez is a true resin, hence, if exposed to Oxygen, it will be inhibited and will NOT fully set. ALL composite resins IF NOT totally cured, will result to uncured monomer and can be toxic to the body of the patient.
2. Use the right NaviTip and length of the NaviTip will be Tooth Length MINUS 3 or better yet, MINUS 4, for Endo-Rez application into the canal. This is to ensure that the NaviTip while excreting the Endo-Rez into the canal, will not be pushed and positioned to the apical constriction preventing the Endo-Rez to go out of the NaviTip and may end introducing air inside the canal. If you feel tightening on the NaviTip while pushing the plunger of the syringe, STOP, then, RETRACT the SYRINGE until the NaviTip attached feels a bit LOOSE.
3. Endo-Rez is dual cure. Meaning, it will only start curing through light’s initiation and will completely self-cure within body temperature. Thus, testing Endo-Rez viability to cure outside the body and in a mixing pad will never work.
4. Make sure you use ONLY the solutions prescribed as mentioned above and totally wash off the Sodium Hypochlorite as this is contra-indicated to all types of resins.
5. If you want to do post and core immediately after obturation, use an Endo-Rez accelerator, so, that in a matter of 20-30 minutes, you can proceed with that procedure. Apply the accelerator to the accessory GP by dipping it to this solution.

6. You have a choice of using no GP (gutta percha), single GP or multiple GP when using Endo-Rez. However, I prefer multiple GP because, One, resins when cured shrink, therefore, this prevent my obturated canal of having air space left as a result from the shrinkage of the resin when cured. Second, it is easier to remove when there’s more GP than none, as resins are harder to remove on itself if it becomes necessary for me to remove or repeat the procedure. And, Third, there’s NO lateral condensation, anyway, needed to do, so, there's no hassle for me not to do multiple GP placement. I just insert accessory GPs with the Master Apical Cone in placed until it becomes tight. I cut the excess on the top and plug it with the heated instrument. That’s it.
7. In multiple canals, I make sure that I don’t allow the Endo-Rez to overflow outside the canal orifice. In case of multi-rooted cases, I stop injecting Endo-Rez a few millimeters from the brim so it won’t flow into the entire pulpal floor that will make it difficult for me to see the rest of the remaining canal orifice/s I still need to obturate with Endo-Rez.
8. DO NOT mix the Endo-Rez until fully ready to be applied into the canal. Also, on the first use or opening of the Endo-Rez, excrete a very small amount of it from the syringe just like what we do in rubber impression materials. Always test first that a good flow of it is coming out from the NaviTip before introducing it into the canal. And, do NOT return anymore the cover tip of the Endo-Rez but already make the mixing tip used to be its cover. Store in the refrigerator for longer shelf-life.
9. I use the Permaflo Purple to cover the orifices to protect the obturated canal/s especially if post and core are not going to be necessary. This not only protect the canal/s but it acts as an indicator as well as to the locations of the treated canals especially if this is a referred case from another dentist who will eventually do the final restoration. This will assists the other dentist to know and take extra precaution not to damage the seal and re-infect the treated canal during his/her restorative procedure. This is ideal thing to do even if your sealer is in not Endo-Rez.

10. Always use non-water soluble or permeable for temporary filling material. Whether it is Endo-Rez or Not, the use of cavit, fermit, etc. are NOT ideal anymore. It results to high probability of re-contamination of the canal you are treating. Use polycarboxylate cement or glass ionomer or resin-based temporary cements.

Attached is the link of the video where you can watch on how Endo-Rez is applied to the canal:
I have always believed that the practice of dentistry especially in our country is a practice guided by our conscience. It seems most thought that it is about the way we charge. It is NOT. In fact, you charge as much as you want BUT it should always be according to the true value of your service and provide that service to the very best of your ability and materials. Do not short change your patient by giving them cheap prices and discounts yet we don’t treat the way we are supposed to treat and use the best materials the way we are supposed to use. Whatever will be the choice of treatment of the patient, there’s really not much direct effect on us because whether to do RCT or extract the tooth, at the end of the day, we will still earn. So, it only truly matters to the patient. Therefore, let be our conscience, IF we still have one, be our guide to really do what we are expected to do as professionals. Provide them honest choices, so, they can give us their informed decisions. Let’s treat our patients like we are treating our own or our loved ones’ teeth. If we do that, then, we indeed act and do the right and true meaning of service befitting for a professional dental practitioner.
[dvk_social_sharing] [et_bloom_inline optin_id="optin_1"]