5 Ways to An Effective Endo Treatment
I will not tell you what to do but can only recommend as I am not Endodontist but I am lucky enough to meet the best of the best dentists that have such knowledge. In the course of our practice, there are many schools of thoughts. Even now we are bombarded with those practicing holistic dentistry that discourages us in some of the evidence-base practices in Endodontics. As a dentist and even in my dealings with my life, I learned that it is necessary for us to listen, weigh and investigate what will be the best in our own practice. In my initial blogs, I always say right attitude is the key to success. So, we can’t immediately dismiss alternative medicine as they are there for a reason. It is up to you whether you will try and consider their teachings. In my opinion, balance is the key. You can blend in what you think is good in both alternative and evidence base practices. However, in the years of my practice and learning from the various and respected Endodontists I get to fortunately meet, they have one thing in common, root canal therapy will never be successful just through mechanical means, it requires proper chemical irrigation. So, I summarise the commonality from all of them:
1. Isolation:
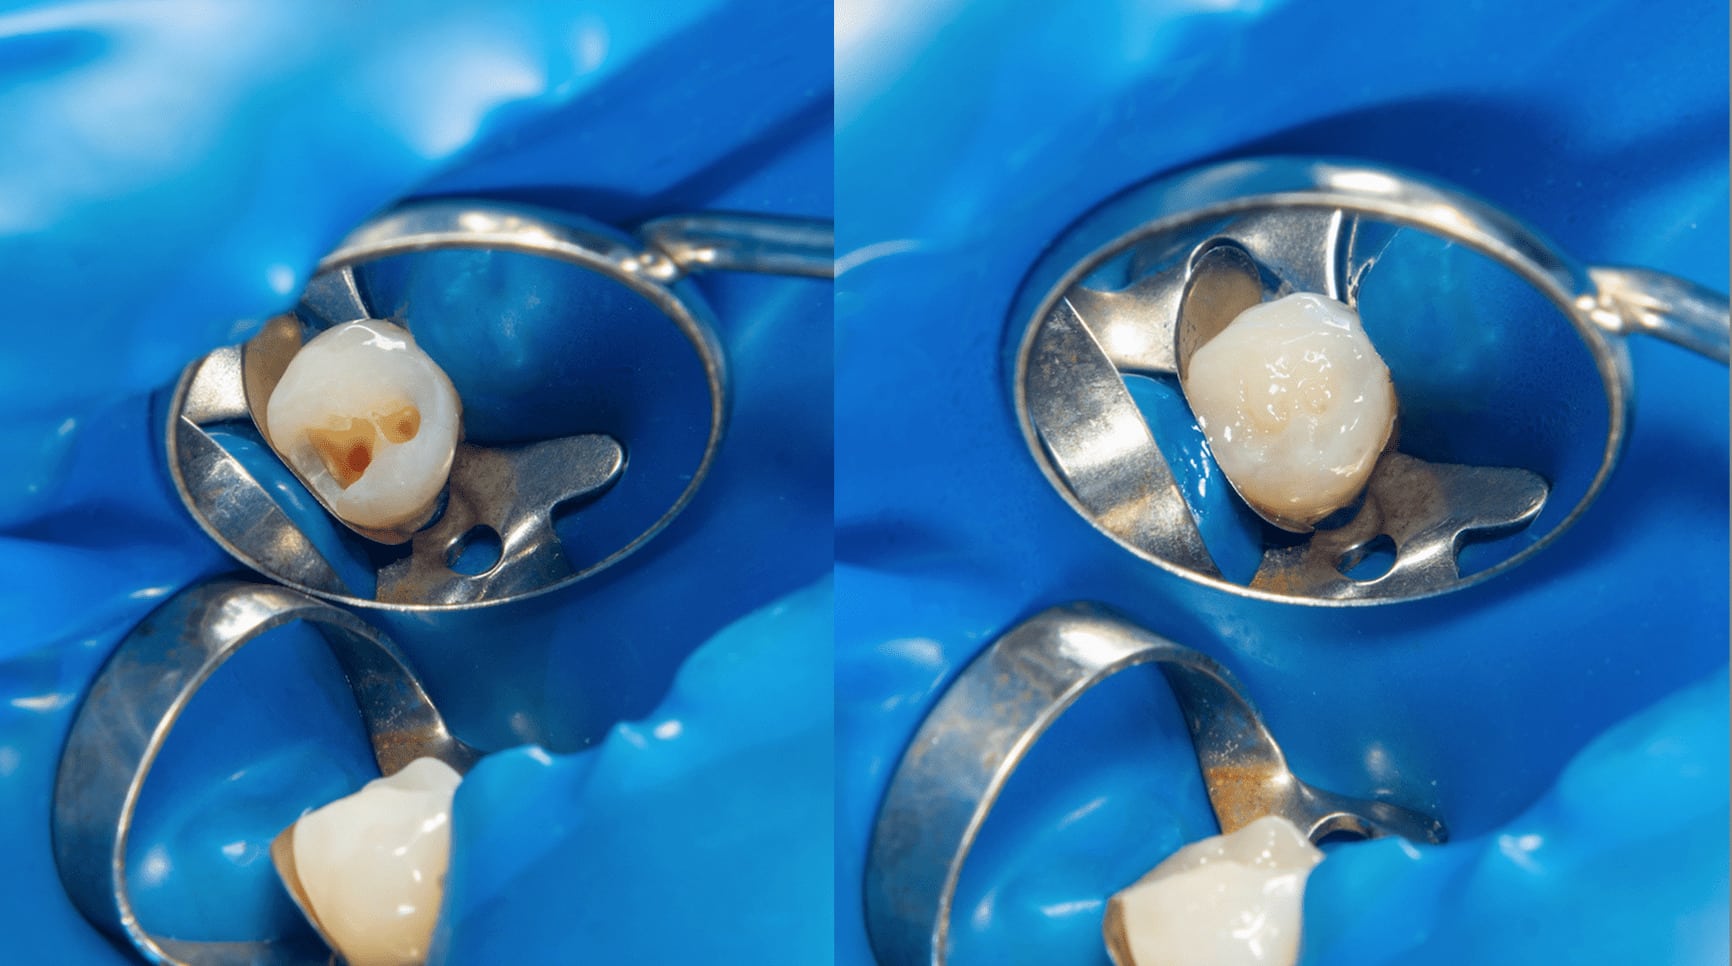
It is critical that you practice Endodontics with the use of rubber dam. This is NOT optional but required. If you don’t, they say you better extract the tooth instead. Bacteria is very hard to control and that what makes your treatment fail half of the time.
2. Mechanical Enlargement:
Choose the right mechanical means to enlarge your canal. It is up to you which one you prefer based on the principles you believe. Again, on this part NO written on the stone just ONE method to enlarge the canal in ALL cases. So, be very discriminating and smart when you invest on expensive equipment. That’s why attending product presentations are the best thing to do when you investigate BEFORE buying. This will allow you to compare where to invest your hard earned money.
3. Your Intracanal Chemical Solutions Or Medicaments:
- Sodium Hypochlorite - Currently, this is the only solution that is commonly recommended for irrigation of the canal during mechanical enlargement of the canal. Why? Because, first, it is highly antimicrobial for the vast majority of bacteria, viruses, spores, fungi and protozoa found in root canals. Second, it chemically helps to actually "dissolve" remaining bits of tissue that could not be removed with the metal instruments. It is the only irrigant that can disrupt and remove microbial biofilm from the infected root canal area. If you use industrial bleach, such as Chlorox, the most common recommendation is that the concentration should be between 2.5% to 3.5% dilution. So, it means if the industrial bleach you bought in the grocery is 5%, then, the ratio of water to the industrial bleach is 2:1 to reach at least the 2.5% concentration required for it to work. You CANNOT use the mixture after more than 4 to 5 minutes because Sodium Hypochlorite is a very unstable chemical, therefore, at that time its ability to give you what it needs to do will not be in its optimal level anymore. The reason why is that exposure of the NaOCl solution to oxygen, room temperature and light can inactivate it significantly, thus, it needs to be always freshly mixed when being used to irrigate the canal. It also have cases that may harm the patient as it sometimes goes out of the apical foramen. To avoid this, the irrigating needle should be placed short of the working length, fit loosely in the canal and the solution must be injected using a gentle flow rate. Constantly moving the needle up and down during irrigation prevents wedging of the needle in the canal and provides better irrigation. The use of irrigation tips with side-venting reduces the possibility of forcing solutions into the periapical tissues. I personally use navitip sideport to relieve me from stress from unfortunate accidents.
- Distilled Water or Normal Saline Solution- This is necessary to irrigate the canal for the total washing of sodium hypochlorite out of the canal after the mechanical enlargement. Why? Because NaOCl is contra-indicated to the use of resins especially if your obturating cement is made of resin whether true resin or not. It cleanses the canal. You can either bathe the canal using syringe but this is the ideal time to use your ultrasonic endo scaler to make sure all the debris is wash away from the canal as well.
- EDTA- is Ethylenediaminetetraacetic Acid. This is either used to lubricate the canal and/or to remove the smear layer. EDTA have 2 types of consistency, the gel type and the liquid type. The gel consistency is normally used for lubrication and the liquid is best for to removing the smear layer. What is the smear layer? A smear layer is created during cleaning and shaping that covers the instrumented root canal walls. This smear layer contains inorganic and organic substances as well as fragments of odontoblastic processes, microorganisms and necrotic debris. It is recommended that you use this as a lubricant only on your very first file to enlarge along with NaOCl to relieve the resistance on your initial filing and avoid fracture of the thin files we normally use for the glide path. Why only in the first file? Longer exposures can cause excessive removal of both peritubular and intratubular dentin. EDTA has little or no antibacterial effect. You will use it again prior to final obturation after you are done with your enlargement to make certain all smear layer are dissolved. Let it sit in the canal for 60 seconds then thoroughly dry.
- Chlorhexidine- Although, Sodium Hypochlorite dissolves organic matter, it doesn’t kill all the microbes necessary to render a disinfected canal. EDTA have little bearing in killing the bacteria, so, we need Chlorhexidine. However, we need to take note that Chlorhexidine if used as an irritant during enlargement will not dissolve the remaining tissue, that’s why this is best used immediately prior to obturation. It is also best that we buy Chlorhexidine for dental purpose and not the mouthwash for this contains emollients and surfactants necessary for its purpose as a mouthwash but, unfortunately, a thin film will be left within the walls of the dentinal tubules rendering the medicament function of your obturating material useless which generally contains Calcium Hydroxide. Calcium Hydroxide, although, does wonderful things as an anti-bacterial, study shows it doesn’t kill Candida and E. Faecalis. When root canal treatment fails as it sometimes does, very often E. Faecalis is found in the re-infected canal/s and it is often thought to be responsible for the failure. Fortunately, chlorhexidine has been found to be very effective against it. Thus, it is suggested that you place Chlorhexidine for 4-5 minutes in canal immediately prior to obturation, then, dry.
- Obturation Cement- On this part, it is up to you what kind you want to use and the method of implementation. I maybe bias in using resin as it has serve me well for years now. Choose what works for you and investigate why it should be use in your final obturation.
4. Oral Medication and/or Interim Treatment Before Final Restoration:
Depending again on the case, additional oral medication maybe necessary to make sure your treatment will be effective. You will probably use in interim temporary cementation in the canal to treat major infection. The use of Calcium Hydroxide is effective interim cementation prior to final obturation and best works at a minimum of 2 weeks and not more than 6 weeks. Calcium Hydroxide is known to dissolve out which would just create space for fluid and bacteria to collect again, so, remove it and place a fresh dose of it during the treatment. Your patient needs to visit you at least at minimum of 2 weeks after placement to check the situation if new placement of Calcium Hydroxide is necessary. I found citric acid to be the solution to remove and clean the temporary calcium hydroxide with the use of a brush tip.
5. Final Restoration:
Again, here it will depend on what the case you are looking at. However, I always use a colored-flowable composite to the orifice to give me guide not to contaminate that area before placement of my final restoration unless I need to do post and core procedure.
Please take note that there are other intracanal irrigating solutions to use, equipment and methods to introduced them to the canal. However, these are the solutions and steps I personally used and evidence-based solutions that I personally have seen to be effective as well as proven through different studies. As I’ve said I am not an Endodontist, so, it is up to you whether you will believe me or not. I encourage you though see to it for yourself and decide. Just MAKE SURE you follow the proper use and instruction of its application. This is the ONLY way to see if it does work for you or not in your practice.
Watch out for the videos I will be making for proper instruction of all its uses.
[dvk_social_sharing] [et_bloom_inline optin_id="optin_1"]
